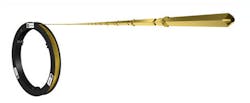
Several years ago, Bead Electronics (a division of Bead Industries), an interconnect pin manufacturer based in Milford, Conn., collaborated with an automotive electronics manufacturing services company to develop a high-performance interconnect pin for use in automotive actuator control systems. This interconnect pin was released by Bead as the True Grip Tandem Pin. According to Bead, the pin’s flanged design offers “superior rigidity, alignment and electrical conductivity while requiring less solder.”
One of Bead’s biggest production issues with this pin was ensuring that each of the tens-of-millions of pins produced on Bead’s machines meet all specifications. The pins, each measuring only .040” diameter x .472" in length, are manufactured tip-to-tail in a continuous chain at 350 pieces per minute. The chain of pins produced in Bead’s production operations is rolled onto large reels that are shipped to customers.
Needless to say, relying on manual quality inspections on such a small product at such high production speeds left a lot of room for improvement.
Although none of Bead's customers required 100 percent inspection, Kevin Mayer, Bead’s plant manager, realized that for Bead to have total confidence in its products, it would need an in-process, high-speed vision inspection system that could measure multiple dimensions on every pin and store the data.
Following thorough research of available vision inspection systems, Bead chose Teledyne Dalsa’s VA61 vision controller, Genie cameras and Sherlock software. This package of technologies is used by Bead to verify the diameter, thickness and length of the pin’s flange, and to measure the overall length of each pin as it comes out of the die-set.
In Bead’s application, Mayer says the VA61 compact vision controller was interfaced with Genie gigabit Ethernet cameras installed on each of the three machines used to produce the interconnect pins. Dalsa’s Sherlock software, which runs on the vision controllers, allows operators to get the system up and running, while the software’s suite of tools enables the capture of precise measurements and helps identify trends that could lead to non-conformances.
“The Sherlock software was more user-friendly than any of the other programs we looked at,” Mayer said. Because of its flexibility and ease of use, he says Bead can program its vision inspection stations for inspection of components other than the interconnect pins. They can also move the system to other machines as the company’s production schedule requires.
Each vision inspection station is networked to Bead’s database, providing traceability to the day, hour and minute of production. This granular data is used not only for analysis of raw dimensional data, but to provide insight into process variables such as tool wear. Mayer says that Bead uses this data to analyze production trends, predict tool life, and proactively schedule tool changes and other preventive maintenance. “This has improved our efficiency tremendously, since we can prepare for and schedule tool changes rather than having to react to a potentially catastrophic tool failure,” he says.
Since installing the Dalsa machine vision systems in 2008, Bead has achieved 100 percent inspection of each of the 50+ million pins produced to date, helping the company avoid costly product returns.
“Our goal now is to have a vision system on every machine in our plant so that we can provide 100% inspection for all of our products,” Mayer says.
Sponsored Recommendations
Leaders relevant to this article:

